 |
|
You are here: STWiki>ST13 Web>UpperFairingRemovalQuickGuide (24 Oct 2013, DaveyB)Edit Attach
Upper Fairing Removal Quick Guide
This procedure begins on page xyzzy of the service manual.Tools and Supplies
Tools
- JIS cross-point screwdriver
-
 A conventional Phillips screwdriver will work but is likely to strip the heads of the screws.
-
 A suitable tool is provided as part of the pre-2006 tool kit. (Honda P/N 99003-10000, requires handle P/N 89103-538-000)
- JIS Screwdriver sets are also available from Internet suppliers, craft and modelling shops. Most US based Auto-Parts stores have never heard of JIS.
-
- 8mm socket or wrench
- 10mm socket or wrench
Supplies
None.Disassembly
Remove the Windshield and height adjustersWindshield motor cover
This will allow access to the windshield slides for lubrication and maintenance, without removing the headlight cowl 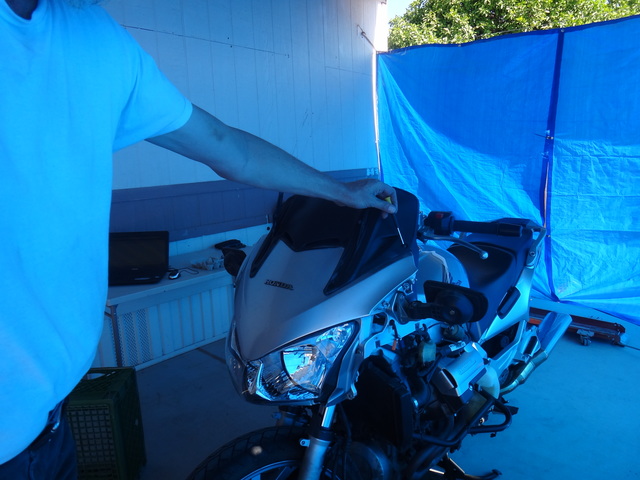 |
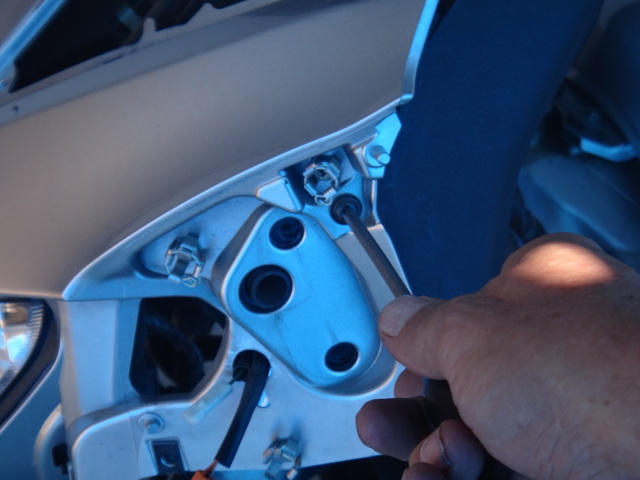
Remove 4 pull-plugs (small plastic plugs with an extra cap on top), one on either side above the mirrors and two on the top edge of the dash. Remove 4 push-plugs (small plastic plugs with a recessed spot in the middle), all located under where the windshield would cover them. |
| remove 4 JIS screws from the top front plate of the dash | 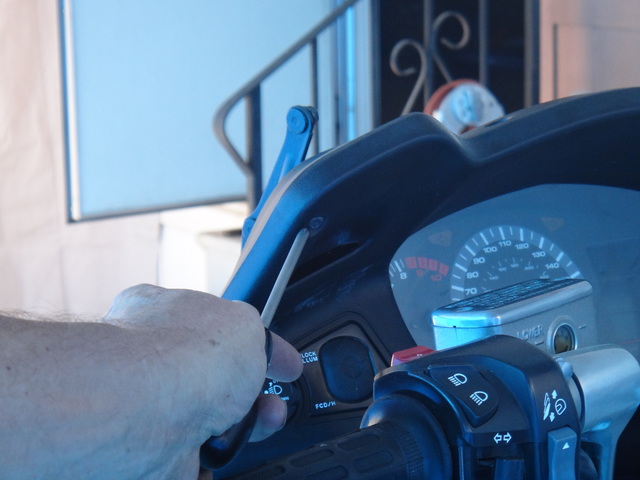 |
Headlight Cowl
If the headlight cowl is to come off, remove only the JIS screws in the Windscreen Motor section above, as the cover will come off as a single piece with the headlight cowl. 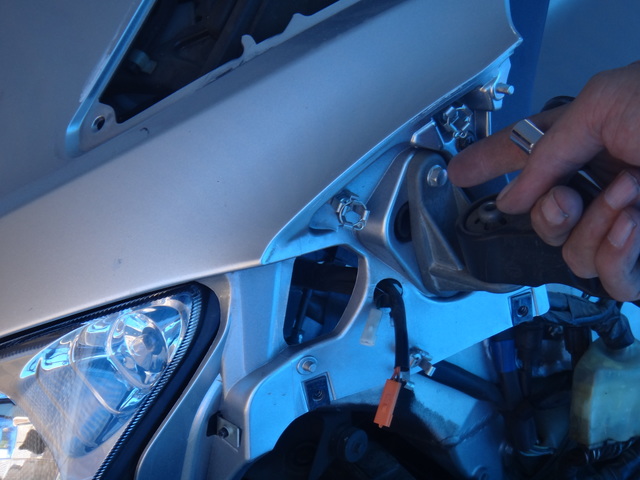 |
Remove the Wing mirror mounting bolts - 8mm - and remove the wing mirrors |
| While holding the front of the headlight, remove 4 jis screws from the back of the headlight | 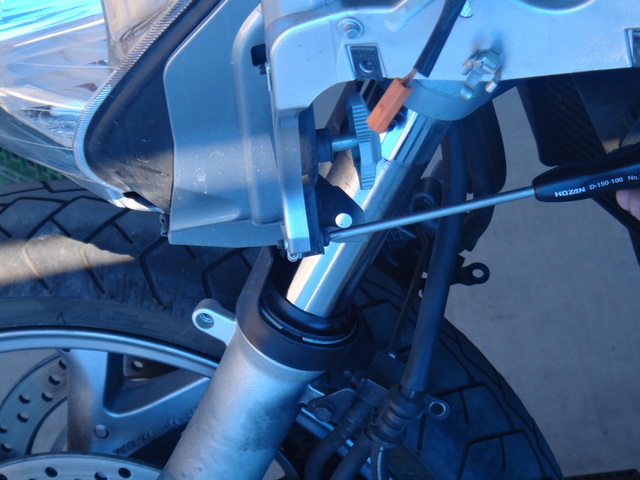 |
 |
Remove 2 jis screws from the wing mirror mount locations, steadying the headlight with one hand. The headlight is only being held by 3 rubber supports, and can easily slip off! |
| Disconnect the rubber retainer from the headlight and remove the headlight cowl. Look closely at the center of the V in the headlights and you will see a black rubber retainer. This is what supports the headlight, there are two more on the forward frame | 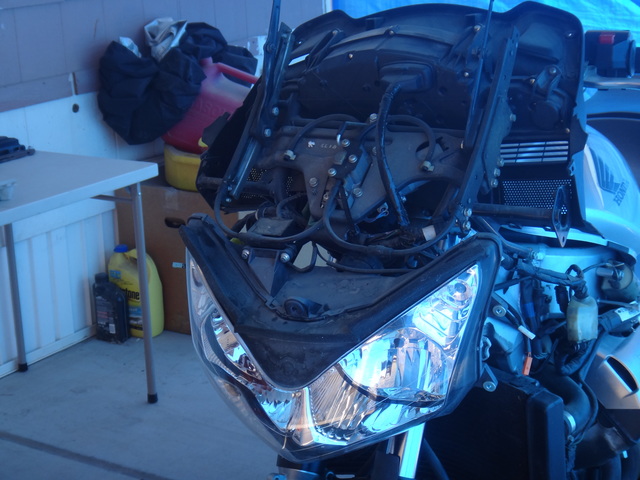 |
Headlight Removal
If needed- Pull the headlight forward off the rubber retainers. Place it on a piece of cloth resting on the front wheel. I place a seat in front and use my knees to hold it while taking the connections off.
- Pull out the marker lights, which are in a press fit rubber housing - lots of wiggle and they will come out.
- Disconnect the electric headlight positioning unit -depress the tab on the plug and it pulls out.
- Remove the tip-over sensor - 8mm socket and JIS screws - you'll know it when you see it, its the only part on a bike that has a label that reads "this side up" !!
- Remove the headlight assembly and store it carefully
Instrument Panel Removal
If needed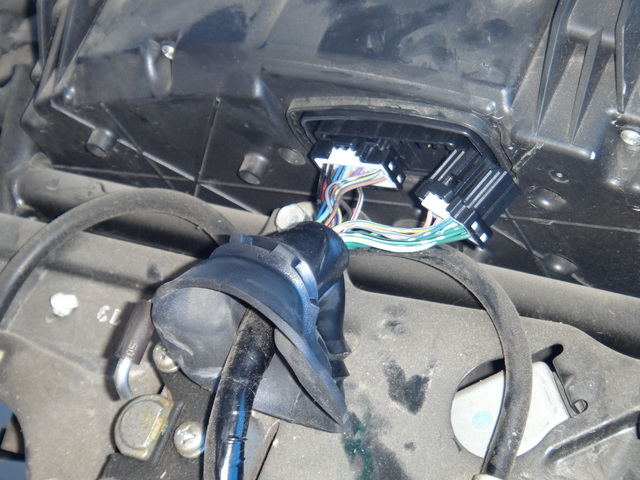
- Peel back the electrical cover on the back of the instrument panel.
- Remove 2 electrical connection plugs by depressing the black tab and pulling the plugs out. The white part comes out WITH the black surround!
- Remove the dash panel and instrument cluster
Procedure
None.Reassembly
Reverse the Disassembly procedure.Post-Service Checkout
Check, while assembling, that the instument panel functions correctly (if removed), and that all lights in the headlight cluster work properly (if removed).Related Information
None.Edit | Attach | Print version | History: r3 < r2 < r1 | Backlinks | View wiki text | Edit wiki text | More topic actions
Topic revision: r3 - 24 Oct 2013, DaveyB
Ideas, requests, problems regarding STWiki? Send feedback